
CJ Bick
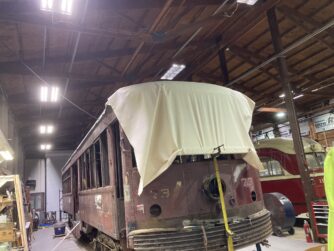
The Museum acquired Philadelphia Suburban Transportation Co. (Red Arrow Lines) 73 in 1990 when it was retired from the operating fleet at SEPTA. This heavyweight, center-entrance, interurban car was built by the J.G. Brill Co. in 1926 and is a sister car to 66, a car that is favored among visitors because of our annual Santa Trolley. Red Arrow 73 ran between 69th Street Terminal and West Chester, Ardmore, Media, Sharon Hill, etc. The years of service and outdoor storage took its toll and left it in need of extensive restoration. Most recently, throughout the winter and spring of 2023, volunteers worked to replace sections of the roof and recanvas it.
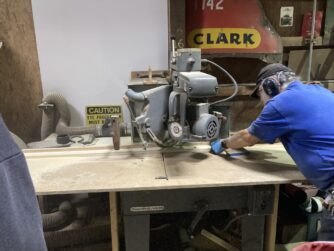
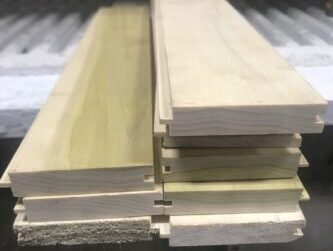
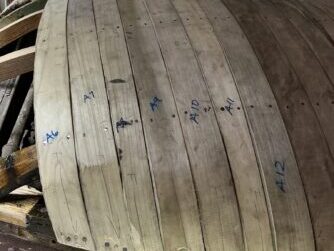
Like most roofs, 73’s was constructed using poplar. The roof has to be strong enough to support all the power collection hardware on top, as well as structurally support the car overall, but also flexible enough to be bent and shaped. The Museum is lucky enough to have access to plenty of poplar and skilled volunteers who were able to mill the boards to the correct thickness and shape. The boards fit together using tongue and groove, to provide strength as any loads are transferred across the entire roof structure, as opposed to a single board.
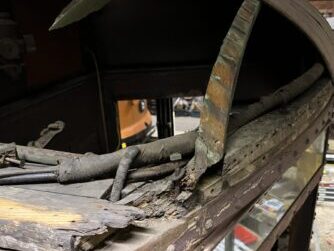
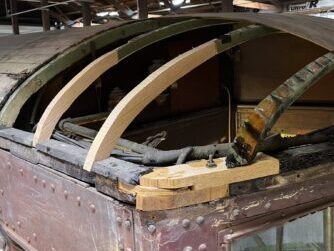
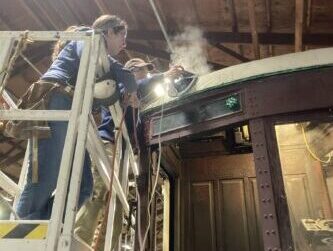
There were a few spots in the middle of the car’s roof that needed to be replaced, but most of the work focused on the bonnet section or end of the car. It was apparent that at some point in the car’s career, it had been punctured by something, most likely a pole, on both ends of the car, as both bonnets showed signs of patchwork. One side was worse than the other, as it needed the entire corner reconstructed from nothing. One of our volunteers, Michael, used measurements from the other, better, side of the car and reconstructed the corner. He also took measurements of each bonnet piece that would need replacing, as each had a slightly different size and shape.
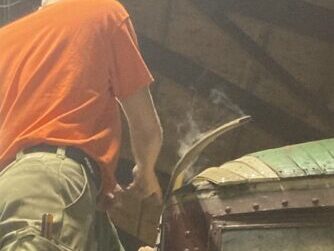
The wood was steamed for fifteen minutes which softened it enough to be malleable. Volunteers had to move quickly before it cooled and hardened, meaning it would need to be re-steamed. They could only reheat the wood once, maybe twice because each time, it sucked more of the wood’s natural moisture out, making it more brittle and prone to splitting. They had about two minutes to bend it in a vice, then pass it up to people working on the roof for them to nail and clamp it into place.
With the roof now solid, volunteers moved on to making the tack strip. A tack strip goes around the perimeter of the car and is what the canvas is attached to.
With guidance from longtime volunteers, Bruce Wells and Ralph Ciccone, volunteer project manager, Michael Buchta made the tack strip by pushing milled boards through the radial arm saw sideways, then using a router and shaper to make the complex-shaped edge. He also used the only remaining cove (corner) piece original to the car to fabricate 4 new ones. Once installed on the car, the roof was painted with 2 coats of paint to seal the roof and it was ready for canvas.
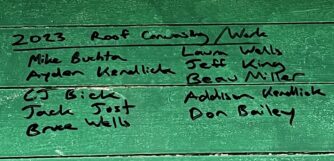
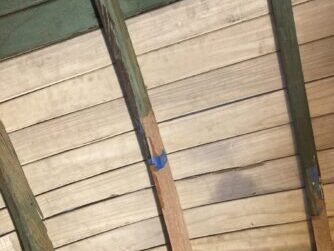
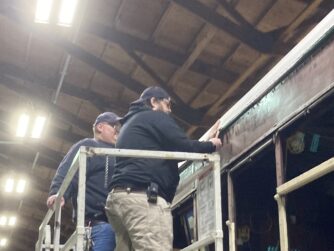
Prior to the canvas being rolled over the roof, the names of the people who helped with this specific portion of the project were written on a few of the boards, as a tribute. The roll of canvas itself was just wide enough to fit the roof and was attached to the car’s anticlimber to allow it to be stretched over the roof structure. Four people were needed and with each team on the opposite side of the car, one person would pull the canvas tight, while the other drove in the tacks. Once everyone got into a rhythm, progress moved quickly down both sides of the car.
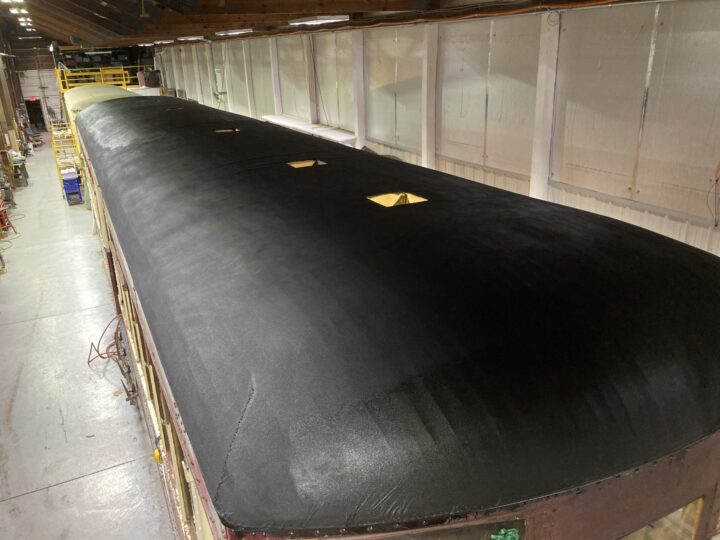
As anyone who has ever wrapped a present will know, it’s difficult to take something two-dimensional and wrap it around something three-dimensional Therefore, a cut had to be made from the corner, up to the center of the car’s roof. The first piece was then glued to both the car’s roof, as well as the other piece before both were tacked down along the seam. The other problem volunteers faced was that straps were still attached to the canvas stretching it out. You either had to work around the straps or cut them off. The decision was made to drive in tacks every two inches to start with, cut the canvas, then go back and drive the rest of the tacks in, so it’d be every inch. This method proved to work well and was done on the other side of the car. For all those interested, there’s approx. 1,850 tacks on the car’s roof.

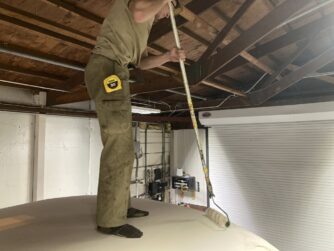
The last problem that arose was the formation of wrinkles along the roof structure, particularly around the ends. Some of them were so bad that it was impossible to drive the tacks in. A creative solution was brought in in the form of an iron. Since water would start the canvas shrinking process, steam from an iron would do the same thing in a very controlled way, over a small area. This proved to work, and the last tacks were driven in. Later that same night, Michael got his feet wet (literally) by wetting the roof with water using rollers and sponges. The roof was allowed to sit for a week to fully shrink to the roof before painting would begin.
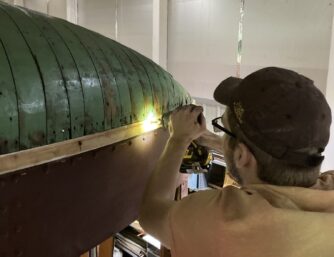
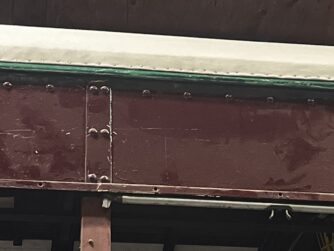
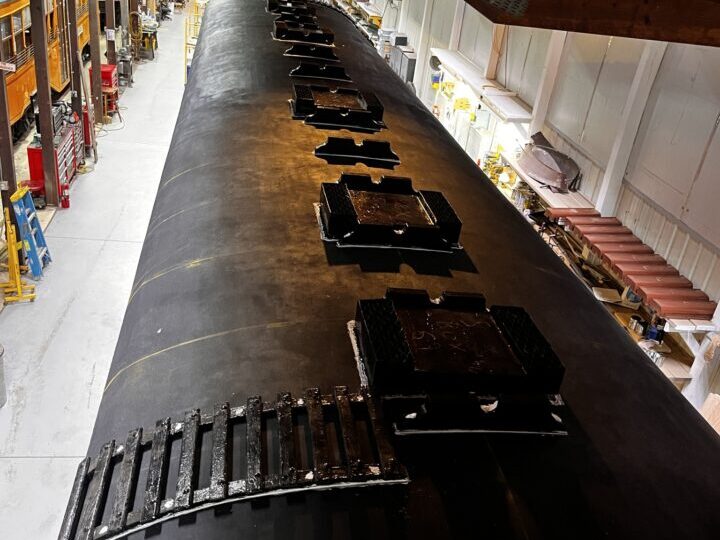
The first coat of paint applied was an oil-based paint that has been thinned down with turpentine. It’s very thin, almost like painting with water, and the goal is that it will soak into the canvas, forming a watertight seal. It was then painted with additional coats of oil-based paint, mixed 50/50 with boiled linseed oil. The life expectancy of a roof is about 50 years, and these measures will ensure that the roof will last at least that long. Next, the roof cleats, ladders, ventilator boxes, & rope guards were added giving the roof a more streetcar feel.
For more information and updates, please Like & Follow our Facebook page Red Arrow Car #73 Restoration Project. We post semi-regularly and it is the best way to keep up to date with the car’s progress.